About Me

My photo
I would classify myself as an artist. It took me a while to finally accept that monicker, but that's what I am; AN ARTIST!!! I have a wonderful hubs that supports my "talents" in most all avenues, except maybe when the credit card bill comes in the mail...LOL And I have 4 great kids and 5 beautiful grandchildren that I love to pieces. Come on by and sit a spell and "STAMP 'TIL YA CRAMP!!! & "CROP 'TIL YA DROP!!!"

Tuesday, January 31, 2012

Love blooms...

it blooms where its planted ....

Valentine's is slowly creeping up on us 
and I saw this design on a blog (sorry can't remember where) and loved it.
I used the cricut to cut all the images.
All the images are hearts of 1/2" increments of sizes 
and even the leaves at the bottom is a heart cut in half and placed just so. 
I used the swiss dots embossing folder to create the background. 
I haven't put a sentiment inside yet, but I think 
I'm simply going to put just as my post title says....

Love blooms...

I'm giving this to my other half.... 
don't worry he won't see this, he never reads my posts.
Bwahahahahahahahahaha!!!
My love blooms more and more for him everyday though....
even if he never reads one of my posts.

Until later, bloomers...... Gotta split.......TFL!!!!
Photobucket

Friday, January 27, 2012

Shower curtain make-over!!!!

I can never leave anything as it is.

Below you will see a video of me painting on my shower curtain.
I love the stripes, but it reminded me of a bumble bee.

I wanted to update the look for a less juvenile look.

Here goes.....


Did ya like it.....

I know, I'm either brave or crazy......  
Bwahahahahahahahahahahahahahaha!!!!

Until later, painters.......Gotta split........TFL!!!!
Photobucket

Finished.... ahhhhhhh!!!

Cabinet finally came in.....
My daughter and myself installed it and
 then my sister came over and added her touches to the decorating.

I think I'm done for a little while now.


I even took a video of the installation to show just how easily it can be done.
With a just a little know how and ingenuity.


The "braces" that I was referring to are simply some scrap 1" x 2" scraps of wood that I
screwed onto the cabinet to help hold it up on the existing cabinet......
almost like a cantilever...
The new cabinet weighed about 50 lbs....

Heather REALLY didn't want to be on video.....LOL

Until later, Finishers......Gotta split......TFL!!!!!
Photobucket

Thursday, January 26, 2012

DIY projects are still underway....

I've been seeing all over the web horizontal stripes for curtains, furniture, etc....  
I wanted to change my bathroom and fell in love with this color scheme..
Yellow, Gray and white.  

It worked perfect for me as we have a gray toilet, shower stall and counter tops.

I couldn't find any fabric that was yellow and white stripes so I sewed strips together to get the result I wanted and from there I created a shower curtain.  

The average shower curtain measures 72" X 72".
My stripes measure 6" finished.  So it was easy to add just enough for the seam allowances and hems to get 12 alternating stripes to come out even. 

12 stripes, 12 buttonholes, and miles ans miles of thread and 
ta daaaaaaa!!!!!!

Still more DIY to get done.

Installing an overhead cabinet today, with a little help from one of my daughters and my sister.  Wish us luck that we get it up without killing each other.

Until later diy-ers........Gotta split.....TFL!!!!! 
Photobucket

Friday, January 20, 2012

Question......


My question is:
What do you want to see me post about this year....???

Maybe more tutorials, more 3-d items, how-to's, 
any specific genres, contests,
simply more regular postings (lol), etc.....

Let me know and I will do my best to make you all at least 
a little more happy in the coming year.

Until later, my faithful followers.....Gotta split......TFL!!!!
Photobucket

Monday, January 16, 2012

We interrupt our regular programming..........

......for some much needed down time!!!!!

I think I'm just clearing my head after the make-over of the kitchen. 

I received as a present for Christmas some xbox 360 games, yep I really did ask for them.

Hubby was a little skeptical at first, he thought that our daughter (who is 12 yrs old) wanted them when he asked her what he thought Mommy would like.
Bwahahahahahahahahahaha!!!!!!
Well, I had already given her a list of the ones I wanted.


I know, I'm kinda nerdy.
But they say to keep your mind young, you need to work out puzzles, read, keep it active. I intend on doing just that!!!!

Side note: I did get other things....
like a table easel, money, candy, etc....

My hubs is the most generous man I have ever met.!!!!!

Until later, gamers........Gotta play split......TFL!!!!!!
Photobucket

Thursday, January 12, 2012

D~O~N~E !!!!

well, almost done. 
Still waiting on cabinet for above the sink and then I can finish the tiling there.

Looking good so far though.  

These are some of the tools I used.

This tile cutter is very simple to use and inexpensive....(I think its around $25-$30)


This miter saw I purchased about 14 yrs ago. I received a gift certificate as a prize 
for a painting project I created. It was a $100 and I used it towards the purchase for this.


and a lot of hard work..... Bwahahahahahahahahahaha!!!!!

Not to bad !!!!!

I also did a video on how to use the tile cutter, how I achieved the different angles.


Until later, hard workers......Gotta split......TFL!!!!!!!
Photobucket

Wednesday, January 11, 2012

tiling almost complete...

Just a small update on the progress of the tiling....
Hubs is going to be surprised. Some of you may not know; but my hubs works out of town  most of the time and anything and everything that gets done around here is by moi.

Here's a few pics of the tile job that I started...now I just have to wait for the tiling adhesive to set so I can grout.

Originally there were white tile here.... and they were in a straight pattern...not diamond.

This is part of the back splash near the sink.....none here previously and I was constantly having to clean the wall and it looked terrible. 

Behind the sink....no that isn't the final color of paint. 

Island before.....  (ugly laminate) 

The laminate came off very easily. 

Hard to see but there are pencil lines marking the center.  You need to start from the center and work your way out to make the pattern uniform. (Especially since our island was an odd size)

Tile is laid and now on to the grouting and trim..... I cut all the tile using a tile cutter (see below)

Messy, but it will be worth it in the end!!!!

Until later, DIY'ers......Gotta grout split....TFL!!!!!!
Photobucket

Sunday, January 8, 2012

Kitchen make-over....

This is what started it all....
I found this metal sign at a local discount store and fell in love with it.
Then it seemed everywhere I looked the same colors and themes were jumping out at me.

I painted my island with black flat acrylic paint to use as a chalkboard...
really, what self respecting coffee shop doesnt have a chalkboard to write the specials on....

Then I re-purposed a tin sign we had before.  I base coated the entire piece and distressed the edges a bit.  Free handed the design and spatter painted the entire piece.

I made two of these; one here and one for a small window.
(I noticed the middle tassel on bottom was flipped under after I took the pic...but its fixed now.) 

I saw this coffee print on pinterest and I copied it and printed it on cardstock.
Painted a blank canvas with the accent color and then layered with more cardstock.
With some watered down acrylic paint, I put more cup rings on the canvas.

I have a pie safe and I had to decorate the top of it as well.  I found this frame at HL in clearance.  The 'Mmmm'.... was added by me using vinyl after I painted over the original saying (friend forever).  I also found these polka dot balls in the clearance, but they were really bright so I took watered down brown acrylic paint and brushed it over them to tone down the colors a bit and then glued them to wooden candle sticks.

Old copper tea kettle that had seen better days was sprayed with Silver hammered metal paint and then using the accent color only on the handle and bottom.

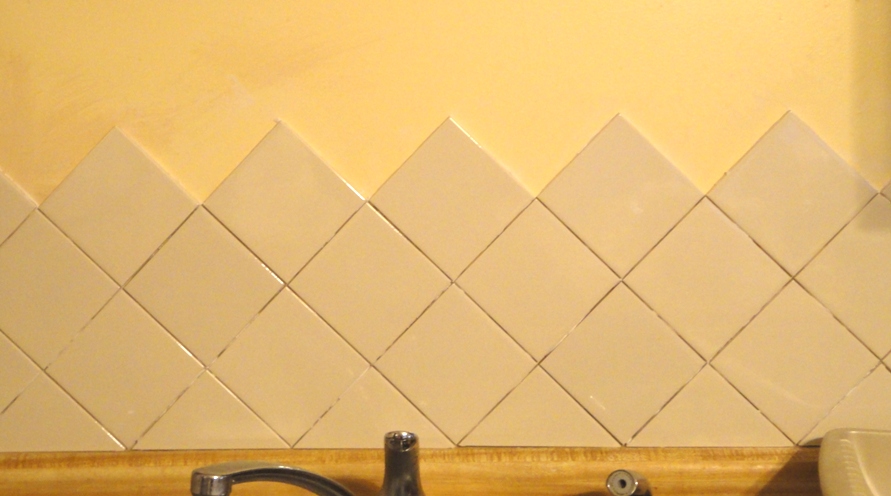
I have since painted the walls a dark latte' color and will be tiling the backsplash behind the stove and sink.

Until later, decorators......Gotta split.....TFL!!!!!!!
Photobucket

Sunday, January 1, 2012

Cheers!!!!!

I'm raising my glass to you and yours for a 
very special and prosperous
New Year!!!!!!


The glass w/bubbles is a large MS punch.
Bubble border is MS punch also.
The rest is simply layering....
and a little glitter thrown in.

Isn't something NEW always with a little sparkle!!!! 

Here's to a great year ahead....{CLINK}!!!!

Until later, Newbies and Oldies....... Gotta split.....TFL!!!!!!
Photobucket